Powered by Blogger.

Friday, September 21, 2012

Creamy Chicken Taquitos


This recipe comes from Six Sister's Stuff

This is one of many of their recipes I plan on stealing trying.

The main difference with the way I made my taquitos was I used my crock pot chicken which is already well seasoned, so I didn't add all of the seasonings from their recipe.

If you were going to use cooked, shredded chicken, you'd definitely want to add some salt, pepper, garlic powder, some onion powder, cumin etc. Whatever you choose, but definitely season it if you are not using this crock pot chicken.

Ingredients:

1 pkg (8oz) cream cheese
3/4 - 1lb crock pot chicken
2 limes
1/2 cup cilantro
1 jalapeno, seeded, veins removed, chopped finely
1/2 cup green onion, chopped
1/2 can (15oz) whole black beans, rinsed
20 soft taco size flour tortillas
cooking spray
salt

So, my recipe incudes cilantro and jalapeno which are not in the original, and leaves out the pepper jack cheese from the original recipe. I also added black beans which were not in Six Sister's Stuff recipe, but they sounded good to me :)


You'll notice there are no green onions. That's because I forgot them. But I had every intention of putting them in and think it would have been a nice addition, so I'm leaving them in the ingredients list.

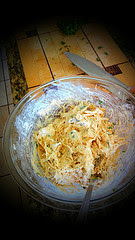
Mix the cream cheese, lime juice (I used 2 limes, they were kinda big and pretty juicy), cilantro, and green onions.


At this point, I split the mix into 3 bowls, to two bowls I added jalapenos (the one bowl without was the kids bowl), then added black beans to 2 of the bowls (the one without is for my husband who doesn't eat beans. Weird. I know.)


Obviously, this is an extra, unnecessary step, but if you have people that won't eat certain things, it is an option :)

Put a scoop of the mixture at the edge of the tortilla and roll it up (don't let the mix stick out of the ends of the tortilla).

Line a baking sheet with foil, spray the foil with cooking spray.

Place the taquitos rolled side down onto the foil. Spray the taquitos with cooking spray, sprinkle with a little salt, bake on 425 for 15-20 min. until the tortillas start to crisp up and the edges start to brown.


Place the taquitos with a small space between each one (not like I did in the picture above). The places where the taquitos are touching will not crisp up as well. They were still super tasty and plenty crispy, there were just small spots that were not totally crispy. So, next time, I'll spread them out some more.

And here they are all crispy and done:


I served these with creamy avocado and tomatillo dip, which is simply one avocado, mashed, mixed with 1 cup sour cream and about 3 Tbsp tomatillo salsa. The dip was really delicious. I'm thinking of all the other uses I can come up with for it :)


Enjoy!


Sunday, September 16, 2012

I cut my own hair!


If you are a hair dresser or a professional in this area, just stop reading now.

Seriously.

Stop.

You will be horrified with what I decided to do on a whim.

Horrified.

And really, anyone who cares about their hair, spends good $ on hair cuts and color and takes more than say, 5min. each day to do their hair, you may want to stop reading too. Ok, so that pretty much eliminates everyone.

I'm not really sure why I decided to do this. It wasn't to save money, although the $100+ I did save by doing this is kinda cool. I don't know why. I'm just kinda crazy like that.

I started looking at YouTube videos for hair style ideas for my daughter. And, I came across several videos on cutting your own hair. I have been doing bang trims for the little girls for a while now, and I cut my son's hair for back to school (that's a brave 7th grader!), and, well, the natural next step is for me to cut 3+ inches off my own hair, add bangs, layers and color it. Myself.

Naturally.

Here is the before:


I don't have a real before pic because I always wear my hair pulled back into some sort of bun. This is because I hate wearing my hair down (especially in summer, but really all the time) and because my hair had grown so ridiculously long, I couldn't do anything else with it. On a good year, I get my hair cut and colored twice. Often, I go once a year. Clearly, my hair is not a priority. I am not sure this time around how long it has been since I got my hair cut. More than a year.

So, this before shows how long my hair had gotten and you can also see the ends are dry. It's basically all one length (there were layers at one time, but they are all grown out). It had some highlights as well (which were all grown out and faded at this point).

The first thing I did was cut off 3 inches. I was unable to find the YouTube video that showed this method, but basically, you start with a ponytail, then measure from the bottom up as much as you want to cut, tie a hair tie at that length. Then slide your first hair tie down just above the second one. Cut off just above the bottome hair tie.


Then I used this method to give it a little less of a blunt cut across the back:


Then I used this method to add some layers:


Then I cut some bangs. I can't find the video I used for this either, but there are tons of fringe/bang YouTube videos.


These are the bangs after I colored it. I didn't take any pictures of this process, it's your basic "Nice 'n Easy" home hair color kit. In dark brown, I think.

Here's all the hair I cut off:


After coloring while it was still damp, I put it up into 2 buns:


I wore this all day and then it was wavy for going out at night.

Here is the after:


I'm happy with it (but I am obviously not picky about my hair :) I knew I had so much hair to work with that if I totally screwed it up, there would be enough left for a professional to fix it. But, thankfully, no disasters and I may stay on top of my hair better now that I can just do it myself.


Tuesday, September 11, 2012

Remembering...


We all have our story of where we were when we heard the news of September 11th. Most can vividly recall the terrifying feelings of shock, fear, despair, disbelief. And for those who lost loved ones on that day, the remembering means something different.


I was a relatively new mom at the time. I had just started a new job, had a baby boy just under 2 years old. I was asleep in bed with our little guy as he had woken me so very early that morning and I was able to convince him to lay down in my bed and let mommy rest. The phone rang and it was my husband calling from work. He worked overnights and had only been in the News business a very short time. He was watching it all unfold and needed to call us. I turned on the t.v. and sat and cried. I was stunned and motionless and alone.

As the day went on, I called work. Do I work on a day like this? Would the state buildings I go to be open? I ultimately decided to cancel my appointments (which I later got in some big trouble for and have always wondered if that CPS Case Manger ever felt like a schmuck for coming down on me for cancelling work on 9/11).

I have family in New York and my thoughts almost instantly went to them. Were they ok? Were their friends, co-workers, neighbors ok? My uncle, at one time, worked in one of the World Trade Center buildings. Was he there that day? Were his colleagues and friends? Eventually, all of those questions were answered. And my family was all ok.

As the years have passed, I've thought about how fortunate I was to have an opportunity to see the WTC in person and to go to the observation deck and the pictures I will always have of that trip.


In many ways, New York City has always held a special place for me. It's a city I have traveled to very few times in my life, but it's a city I feel connected to through family. My dad was born and raised there (moving to Phx as a teenager), my grandmother, several aunts, uncles, great-aunts, cousins all still live there and have lived there their whole lives. They are New Yorkers and I am always struck by how apparent that is each time I see them. And in the days, weeks, months after 9/11, I felt the sense that as a nation, we all felt like New Yorkers for a little bit.

The feelings of unity, brotherhood and community were overwhelming. We, as a nation, were family.


Some of our family members had been deeply wounded, searching for loved ones, hoping and praying for survival.


Many in our family had died, taken from us unfairly, too quickly and out of hatred.


Some in our family lay down their own lives for each other.


As a family, we mourned these losses together


Several years after 9/11, in 2008, I traveled to NYC. This was the first time I learned of the Little Chapel that Stood. St Paul's Chapel is right across the street from Ground Zero and as buildings around it were falling and debris was flying, the little chapel came away unscathed, not even a broken window.


And that chapel became the space where rescue workers came for a hot meal, to rest, to change their boots and to pray.


People worked around the clock in an effort to rescue anyone they could. Members of the community brought meals, clean clothes, and a shoulder to cry on to support those rescue workers.


The fence around the yard of the church became a memorial.


Today, as I am remembering 11 years ago, I am struck by how moved people were to give of themselves in so many ways, how we became family through tragedy, how we were able to put aside petty differences for the greater good. And while, 9/11 will always be marked by tragedy, death and sorrow, I am reminded that so it is, also marked by Family and Hope.


Thursday, September 6, 2012

Experimenting with New Frosting


I tried out 2 new frosting recipes recently, both very different from each other. I like to have some other options besides the standard butter and powdered sugar buttercream frosting that I typically use.

In searching for a frosting that could hold up to being in the heat for a period of time (I have a late September outdoor wedding in AZ that I am making a cake for and need some frosting that wont slide off the cake in all that heat), I came across IndyDebi's buttercream recipe that got great reviews for holding up well in heat and humidity for long periods.

Indydebi’s Crisco-Based Buttercream Icing:

Ingredients:

•1-1/3 cups Cricso
•1/3 to 1/2 cup milk, depending on consistency needed
•3 Tbsp powdered Dream Whip (*)
•2-3 Tbsp clear vanilla, depending on your personal taste
•2 lbs powdered sugar
•(*) A powdered whipped topping mix made by Kraft Foods, usually found in the cake/sugar aisle in the grocery.


Instructions:

There’s no wrong way to mix this. I usually mix all but the powdered sugar for a minute or two, then gradually add the sugar, but the only reason I did this was to avoid the “sugar-splash” factor. The longer the mixer runs, the smoother it gets. Sifting the powdered sugar before blending helps with smoothness but is not necessary.


In addition to the vanilla extract, I also added butter flavoring since this is made with Crisco instead of butter. I used 1/2 cup milk and it was still very, very thick making it a little difficult to spread. I think next time I will add a little more milk to thin it out a bit because it was a little hard to work with.

Here is the cake I used this frosting on:


The Verdict:

It did hold up really well, so it definitely will be the recipe I use for the upcoming wedding cake. It crusted nicely and made a good base to lay the fondant on. As for the taste, this is harder for me to assess. Although I love to make cakes, cake and frosting are not my favorite things to eat. I'm the person that scrapes all the frosting off to the side and just eats the cake. One downside to this recipe is that it has the "mouth feel" (is that a saying?) of shortening rather than butter. It tasted good, but it tasted like frosting, and well, I don't like frosting :) But, everyone that ate this cake said they liked it.

The next frosting is like the exact opposite of the first one. It's more like a whip cream frosting, very light, very easy to spread and not the frosting you would want to use in heat and humidity. It uses a heated milk and flour mixture, which is kind of interesting.

Ingredients:

5 Tablespoons Flour
1 cup Milk
1 teaspoon Vanilla
1 cup Butter
1 cup Granulated Sugar (not Powdered Sugar!)

Directions:

Bake your favorite chocolate cake and let it cool.

In a small saucepan, whisk flour into milk and heat, stirring constantly, until it thickens. You want it to be very thick, thicker than cake mix, more like a brownie mix is. Remove from heat and let it cool to room temperature. (If I’m in a hurry, I place the saucepan over ice in the sink for about 10 minutes or so until the mixture cools.) It must be completely cool before you use it in the next step. Stir in vanilla.

While the mixture is cooling, cream the butter and sugar together until light and fluffy. You don’t want any sugar graininess left. Then add the completely cooled milk/flour/vanilla mixture and beat the living daylights out of it. If it looks separated, you haven’t beaten it enough! Beat it until it all combines and resembles whipped cream.

Grab a spoon and taste this wonderful goodness. If there is any left after your taste test, spread it on a cooled chocolate cake.

Cut yourself a piece and put it on a pretty plate. Grab a fork and prepare to experience the most divine pairing you can imagine. This frosting on chocolate cake is to die for. Sure, the recipe sounds strange — it has flour in it — but it’s sublime. Try it, you’ll see. You’ll love it so much you won’t go back.


Here is the cake I used this frosting on:


The Verdict:

I liked the really light consistency of this. It wasn't too sweet, which would be perfect on a really sweet cake. It had a good flavor and didn't have that heavy buttercream quality. It was super easy to spread, but definitely not the best frosting for decorating a large fondant covered cake, like the one I did. I think it would be a perfect cupcake frosting though. My daughter who likes the piece of cake that has the most frosting (and will even eat the frosting I scrape off), loved this frosting.

There you go, 2 different frostings as an alternative to your everyday buttercream.

Enjoy :)


Linking up here:

All Things Homie
KitchenFun
Liz Marie Blog
Chic on a Shoestring Decorating
SixSistersStuff.com