Powered by Blogger.

Sunday, January 6, 2013

Maine Lobster Linguine


Our first stop on our U.S. Food tour is Maine. So, of course, we made Lobster! This was a first for our family. We bought live lobsters from our local asian market (I'm certain these lobsters came straight from Maine, though). Thanks to my husband who had the task of purchasing the lobsters, bringing them home and putting them in the sink, then into the boiling water. All of that was just way too scary for me.

Between screams, I managed to snap a picture of the lobsters as they were splashing all around in the sink:


Bring a large pot of water to a rapid boil, drop in the lobster, cover and boil for 15min. We cooked our lobsters individually because we didn't have a large enough pot for both. Our lobsters were about 1.5 lbs. A 1 lb lobster should cook for about 12-15min, a larger lobster (1.5-2 lbs) should cook for 15-20min.

Here they are cooked:


Then, I followed these directions for getting the meat from the cooked lobster:


The recipe for Lobster Linguine came from the Maine Lobster Council's website.

It's under campfire classic and some of the directions include cooking the lobster at camp. I don't know what kind of cooking equipment people in Maine take camping with them, but I'm pretty sure this is not a recipe I'd ever try to make at a campfire.

So, I just followed the recipe almost exactly as written, minus that campfire part. And we LOVED it! Here are the ingredients and instructions as I did them, which are only very slightly different than the original recipe.

Ingredients:

1 lb linguine
2-3 Tbsp olive oil
10 cloves garlic, chopped
4 Tbsp butter
2 Tbsp olive oil
1 cup chardonnay
1 Tbsp anchovy paste
4 scallions, chopped
1 red bell pepper, chopped
10 large basil leaves, torn
1 lb lobster meat, cooked and chopped into bite sized pieces (I don't know if this was a pound of meat, it was 2 lobsters, more than enough meat for this amount of pasta)
salt and pepper to taste
cayenne pepper to taste
1 cup parmesan cheese, grated
1/2 cup pine nuts

Directions:

1. Cook linguine al dente, strain and toss with 2-3 Tbsp olive oil Cook lobster and shell as in video above
2. Heat 4Tbsp butter and 2Tbsp olive oil (you can substitute some or all of the butter with more olive oil, but lobster connoisseur's insist lobster is eaten with butter)
3. Add garlic, keep on medium heat and lower if garlic starts to brown
4. Add chardonnay, then anchovy paste (let reduce about 5-7min)

(the original recipe called for 2-3Tbsp of anchovy paste, I only used 1 because I had never used it before and it scared me a bit)

5. Add scallions and red pepper, cook 5min.


6. Add basil, lobster pieces, linguine, salt, pepper, and cayenne, toss to coat in sauce


7. Add parmesan cheese and pine nuts, remove from heat and serve


It was soooo good! I'll definitely be using this recipe in the future with shrimp or even just add more veggies. It's a great sauce! And homemade lobster was definitely worth the effort and expense (and freak out).

And while in Maine, we had blueberry muffins for dessert, so check those out too - YUM!

Food Tour USA

Next stop: New Hampshire


Linking up here:
Tuesday To Do Party
Lil\'Luna

All Things Homie
Somewhat Simple
Liz Marie Blog
One Artsy Mama
KitchenFun

Chic on a Shoestring Decorating

Food Tour U.S.A.


Happy 2013!

This year, I am taking a virtual tour around the U.S., preparing famous dishes from each state, every week. Our family is starting our tour in the Northeast. Since we live in the Southwest, we thought it would be fun to start somewhere far from home. Each week, I'll be posting the recipes we tried from each state.


First up is Maine, where we will of course, be having Lobster!

Here's the food tour schedule, so far:

Maine - Lobster linguine, blueberry muffins
New Hampshire - Corn Chowder, Bread and Butter Pudding
Vermont
Massachusetts
Rhode Island
Connecticut
New York
Pennsylvania


Linking up here:


I Heart Nap Time
Tuesday To Do Party
Lil\'Luna

All Things Homie
Somewhat Simple
Liz Marie Blog
One Artsy Mama
KitchenFun

Chic on a Shoestring Decorating

Friday, November 30, 2012

Mexican Stuffed Shells


I saw this recipe over at The Girl Who Ate Everything blog. She has some really fun looking recipes that I am most definitely going to try.

My family was way skeptical of these stuffed shells, but everyone loved them and approved of them going on the dinner rotation.

Her recipe calls for ground turkey with taco seasoning, but I used my crockpot chicken. Yes, I'm talking about that chicken again :)

She also used taco sauce and I used enchilada sauce instead. Go check out her recipe b/c her pictures are much more appetizing than mine.

Here's the recipe:

1 box jumbo shell pasta
1 lb. crockpot chicken (you could use ground beef or turkey or any shredded chicken, then season to your taste)
1 8oz pkg cream cheese, softened
1 can green enchilada sauce
2 cups shredded cheddar cheese


Directions:

Prepare the shells according to package directions (salt the water to help prevent sticking), drain pasta and spread out on wax paper to prevent sticking.

Mix the crockpot chicken with the package of cream cheese in a bowl.


Spread a thin layer of sauce over the bottom of a 9" x 13" pan. Spoon the mixture into each shell and place in the pan.

Pour more sauce over the top of the shells (I used most, but not all of my 15oz can of enchilada sauce).


Sprinkle shredded cheese over the top, cover with foil and bake at 350 degrees for 20min.


Remove the foil and bake uncovered another 10-15min until the cheese is bubbly.


We served ours with sour cream on top.

It's really a versatile recipe, you can use a variety of meats (or no meat and just use ricotta and cream cheese with mexican spices or taco seasoning) and whatever sauce you want and a mix of cheeses or just plain cheddar or whatever you fancy :)

FUN!


Linking up here:


One Artsy Mama

SixSistersStuff.com


Saturday, October 20, 2012

Pork and Ginger Potstickers


I've had this recipe forever, so I have no idea the original source. I've tweaked it over the years as I have made these, so I guess it is now MY recipe.

I don't make these often because they can be a little time consuming and because I just don't think about it much. But, they are not difficult to make (although, my husband says time consuming = difficult). They are so worth the extra effort though!

Ingredients:

2 cups shredded cabbage
1/2 Tbsp. salt
1 lb. ground pork
2 Tbsp. minced ginger
1 1/2 Tbsp. minced garlic
2 Tbsp. thin soy sauce
3 Tbsp. sesame oil
1 egg

Goyza wrappers (you could also use wonton wrappers, they will just be a different shape)
1-2 cups chicken stock

Dipping Sauce:

2/3 cup soy sauce
2/3 cup rice wine vinegar
2/3 cup scallions, chopped
2 Tbsp. sesame oil
2 Tbsp. Sambal (I used Sriracha instead)

Directions:

Sprinkle cabbage with salt and let sit 30min. Squeeze out as much water from the cabbage as you can.

Mix all ingredients except stock in a mixing bowl.


I didn't take pictures of the process here, but I used fresh ginger and grated it with a fine grater. Fresh ginger is very strong, so keep that in mind. I have never made this using ground ginger or minced ginger that was not fresh. I think it would really change the final product. So, use fresh ginger.

Place a small scoop in the middle of the wrapper, wet your finger (I have a small bowl of water near me) and wet the edge of the wrapper.


Fold the wrapper over (making a moon shape) and pinch the edges together to seal.


This is where it starts to get time consuming. The biggest issue is just that you have to cook them in small batches, so it takes a while.

Coat your pan with sesame oil (you can use any oil really, but sesame is the best for this recipe). You are not trying to deep fry these things, so you just want to coat the bottom of the pan (sorry, no real measurement here - 2Tbsp, something like that). They naturally stick a little and that's ok, you want them to (that's why they're called potstickers, no really, that is why). You just don't want them to stick so much they burn or you can't get them off the pan.


Place them in the pan making sure not to overcrowd the pan. Let them brown on one side (a couple of min). I like to move them around a little and slide a spatula under them just to make sure they are not sticking too much. Once they have browned, pour a cup of chicken stock in the pan and immediately cover.

BE CAREFUL this will cause all kinds of splattering, so have your lid ready and pour the stock and cover right away. Now, they will steam in the stock until fully cooked. After about 5min, if the liquid is totally evaporated, add more stock (or water). Cook until all the liquid has steamed off (about 7min total).

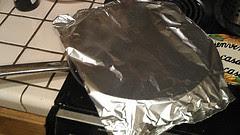
This part of the recipe really depends on your pan. Mine took about 7min. I used 3 different pans b/c I was making them for a party and was impatient and didn't want to take forever cooking 5 at a time in one pan. Because I only had 2 pans with lids, the 3rd pan I just put foil over the top.


I did not intend for this to be a "which pan works better for this recipe" experiement, but that's what it turned into.

I had only intended on using the pans with lids, but out of desperation also used a pan with foil. It turned out the pan with foil worked much better than the other 2. In fact, one of my lidded pans was so bad (burning the potstickers and sticking so much I couldn't get them out of the pan), I stopped using it completely.

So, if you do not have a pan with a lid (or maybe even if you do), you may want to just use foil over a saute pan instead.

One last thing about the pan, none of the pans I used were nonstick. I just don't own any nonstick pans (I know that's kind of crazy). I got rid of all of them many years ago with all the teflon issues about that stuff scraping off into your food. I think that is not as much of an issue anymore, but I have just never gone back to using them.

Anyway.....

If you used a nonstick pan, I'm sure the results would be way different. You just have to do a batch and adjust from there (more oil if sticking too much, move the potstickers around to prevent them from getting stuck, pan covered in foil needs more liquid added part way through since there is more evaporation etc.) After your first batch, cut into one and make sure the cooking time you are using is cooking the pork all the way (we don't want any undercooked pork here).


Serve with the dipping sauce.
To make: simply put all ingredients in a bowl

These are so dang good. I like them better than some restaurant ones I've had. They have a distinct ginger flavor, which I love, but I suppose if you hate the taste of ginger, you will not like these (and to that I say "poo on you").

Anytime I've taken these to a party, they are a big hit. They're even good cold. One thing I have noticed is that every time I have taken these for a crowd, there is always at least one person that does not eat pork. I've thought about making them with ground chicken sometime, since it pains me to see people pass up on them b/c they contain pork. But I just love them too much to change it up :)

Hope you love them too!


Linking up here:

I Heart Nap Time

Tater Tots and Jello
Too Much Time On My Hands

SixSistersStuff.com
UndertheTableandDreaming
Tuesday To Do Party

Delightfully Dowling
Bowl Full of Lemons